Showing posts with label tutorial. Show all posts

Monday, June 6, 2011

Easy Bottle Cap Necklace Tutorial

It is pretty easy and simple to make bottle cap necklaces  and even kids can do it too with parent's supervision. 


Materials need:

Bottle cap necklace
epoxy drop

Bottle cap Image of choice

1 inch circle punch

Glossy Accents

(brought all my supplies on Etsy)

I printed my image on photo paper and use my 1 inch punch to cut my image, after that I add the 

epoxy drop to the image to give it the laminated glassier look.


 Last, you add the image to your bottle cap and I use the glossy accents on the corner because I don't like to see the paper when you look close and it gives it a nice finishing touch... After, it is all dry, I use nail polish remover to clean it up.

 And VOILA , here is you necklace ( a 5 min project)... Perfect craft for kids to do in the summer and really fun to put together :)

I also do the same thing for my bottle caps bows and you can also put magnet on the back for decorations.


I am really suck at giving direction, so if you don't understand all that rambling, feel free to email me questions or just leave a comment :)

Happy Crafting Everyone

Wednesday, May 4, 2011

Blog Swap with Polkadots on Parade

Today is a pleasure to Swag blog to a blogging friend of mine. She has some pretty cool thing going on in her blog and she also have a linking party where you can show off your stuff...So, I will stop rambling and let you meet her, don't forget to visit her and let her know you stop by.
~~~~~~~~~~~~~~~~~~~~~~~~~~~~~~~~~~~~~~~~~~~~

Hey Everyone!!

I'm Jaime from Polkadots on Parade and I'm so excited

to be trading guest posts today with Suze!!

She's such a sweetie and a good bloggy friend!

Today I'm going to show you how to make a beaded bracelet!

You will need:

Assorted beads

Crimp Beads

Beading Wire

Jewelry Clasp

Crimping Tool

Wire Cutters


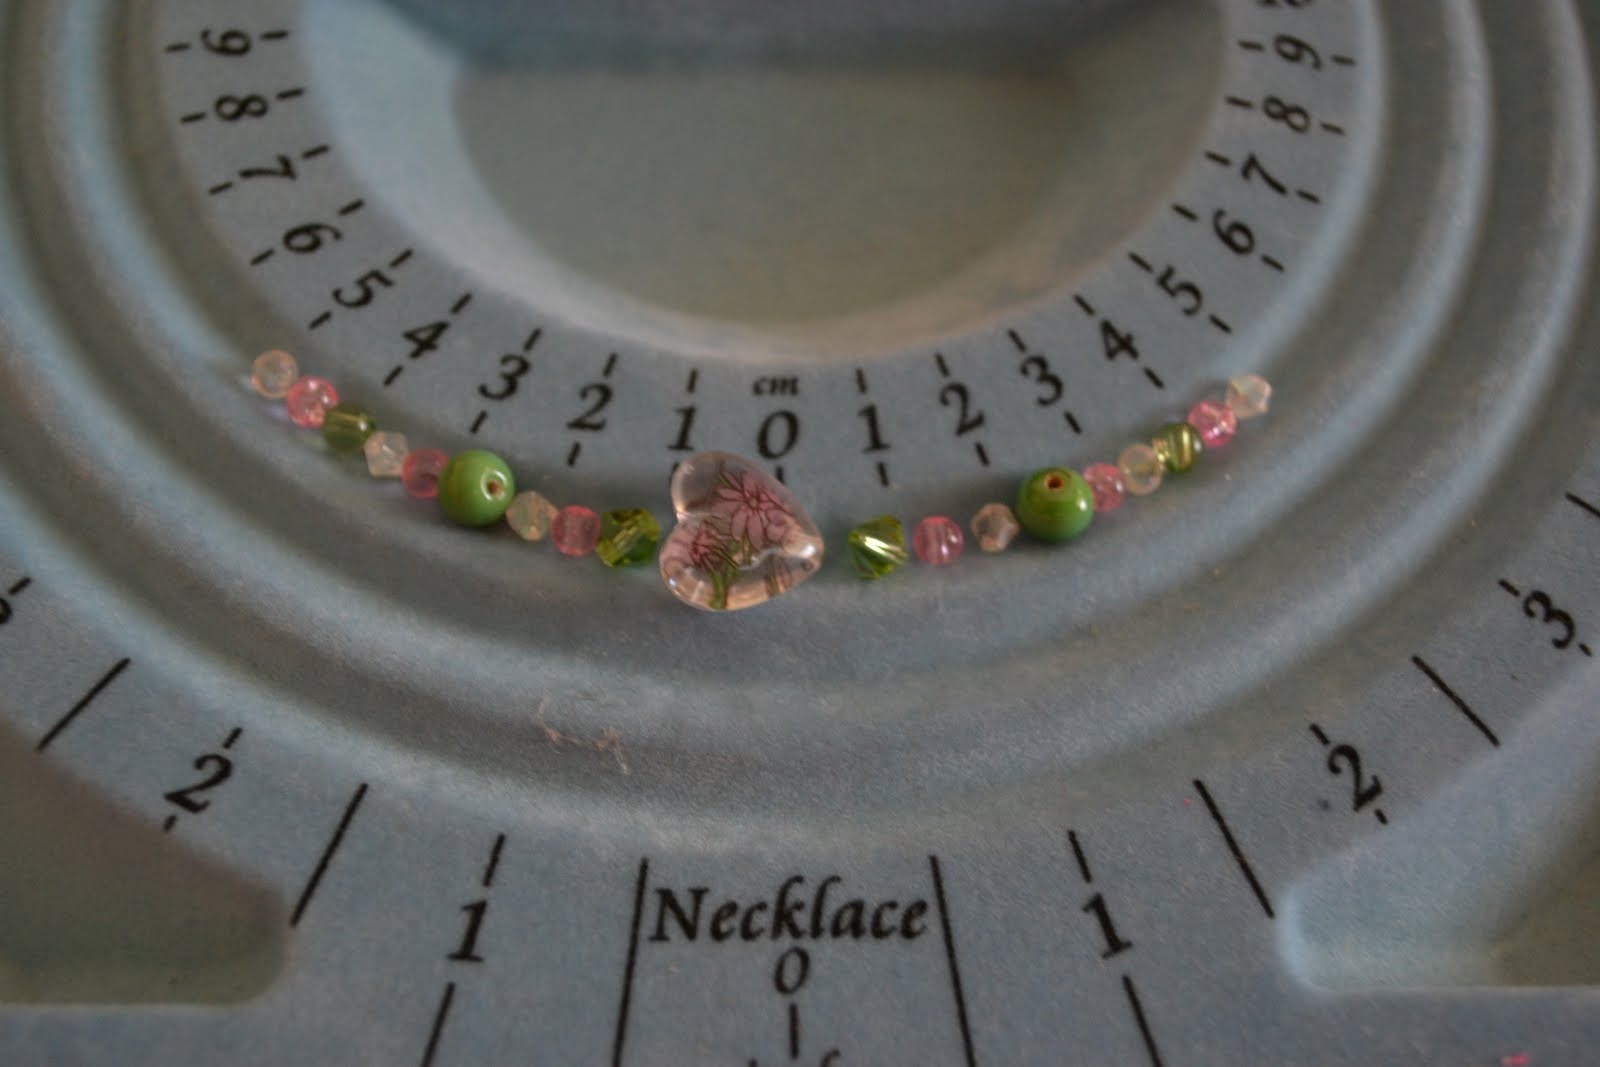
Decide on a pattern for your bracelet and line up your beads.

I always change mine around a million times, getting it just right!


Measure the wrist and add 2 inches on each end. My daughter's wrist is 5 inches around, so I cut 9 inches of beading wire.


Slide your crimp bead on the wire, followed by one end of your clasp. These toggle clasps are cute, but I've also really like the lobster clasps as well.


Take the end of your wire and fold and tuck it into the crimp bead.


Place the crimp bead into the lower notch of your crimping tool and squeeze. Then turn the bead 90 degrees and place it in the upper notch of your crimping tool and squeeze again. This makes it double folded. Tug on your crimp bead. If it doesn't move, you're done! If not, crimp it again until it doesn't move. If the crimp bead breaks, no worries! Just start over. :)


Slide your beads onto the wire in the order you laid them out, making sure that the short wire is covered by the beads.


Once the beads are all on,  double check that the bracelet is the right size on the wrist.


Slide another crimp bead on the end, followed by the clasp.


Fold the wire and tuck it into the crimp bead and then through the first few beads of the bracelet. Pull the end of the wire taut so there are no gaps between the beads.


Use your crimping tool as before, once in the lower notch, and then in the upper notch. Tug to ensure it doesn't move.


Use your wire cutters and cut off the excess wire.


So sweet!!


My daughter couldn't wait to wear it!!

Enjoy making bracelets for all the little girls in your life!

And the big girls too!!

Just think of all the colors and possibilities!

Thanks Suze for having me today, and I hope you will all come visit me over at Polkadots on Parade!


Thank you Jaime for a wonderful tutorial...Little miss Princess G will love one of those, so I am going to get to work and make her one of those :)

PS: Working on some cool bows with matching necklaces, can't wait to show them off :)

Wednesday, April 6, 2011

How to Make a Heart Shape Clippie,


I was browsing online and found those heart hair clipped but could not found a tutorial for it. So, I decided to make one in case someone else was also looking for one. Hope you will understand it well. . .Since I can barely follow instruction I also have a hard time giving it too.

Materials
  •  3/8 Ribbons ( any color or design)
  • Hot glue gun
  • Single Prong Alligator Clip

 I used two different ribbons but you can use one or even three, it is all up to you. I cut the outside one 5" and the inside 4"5. Don't forget to burn the end of your ribbon!
 Then you glue them to make the end of the heart ( If you don't understand, the picture should be able to help)
 Glue them on top of each other with the bigger one on top ( you can just glue the tip of the end together). Then you glue it on the clip ( after you cover the clip). . . Remember to glue just the little pointy end.

 Then you give the top part the heart shape and put a little bit of glue to help hold it in place and you all done :)
You can even add stones to make your own :)

 Then let you sweetie wear it with proud :)

Hope you understood all that bla bla bla and if you don't just let me know.

Ps. who said baby girl is only allow to wear heart clippies on Valentines?!

Linking up to this parties

Saturday, March 19, 2011

flower headband~tutorial

Materials
  • Plastic headband ( I use 3/4 but I am sure you can use any size)
  • Small Flowers and a big flower ( optional)
  •  3/8 Ribbon ( which ever color you want)
  • hot glue gun

 Take the headband and wrap the ribbon around it, for the 3/4 headband I use 37 inches
First you glue the big flowers ( wherever you prefer) than the small ones until it is all cover.
And VOILA ,this can also be use for flower girls without the big flowers, just the little ones. Now she gets to show it off in church wearing her polka-dot purple and white dress :)
The one I did is actually lavender and white but since I craft after bed time ( late at night) you can really see both colors!

Click HERE to enter a tutu giveaway from me :)

Thursday, March 10, 2011

How to make a board hair bow holder.

I was running out of room of my daughter's hair bow holders ( 2 of them, I know. . . I have a hair bow addiction) that I made a while ago, so I decided to make something bigger. I saw some HERE but I pretty much made it my own way ( can't follow instructions very well), here is how I did and hope you will find it useful.

  • Materials need
  • Canvas ( size of your choice)
  • Fabric
  • Hot Glue Gun ( with a burned finger, OUCH)
  • Ribbons


I use my hot glue gun to cover the canvas with your choice of fabric, you can also use staples. It is brown and pink to match baby girl's other hair bow holders.
Then measure you ribbons to go across ( don't forget to burn the end of you ribbons), you can pick how far apart you want them to be from each other. I even add a cute bow on top because I am crazy and want to put a bow on anything. The brown ribbon in the left, I use velcro to keep it together so it can be detachable to put Pony'O and the one in the left I also use velcro and it is for headbands.
And here is the finishing product, really happy about how it turned out and plus I can make even more bows for baby girl!
Let me know if you have any questions. I also will love to see if you make one, so send me a link or pictures.

Happy Crafting Everyone!


Wednesday, March 9, 2011

How to Make a No Sew Tutu

It is really easy to make a no saw tutu and here is how.

What you will need.
  • Tulle
  • Elastic band for the waist 
  • Needle and thread

First cute the elastic band to the appropriate waist length then sew it to make the waist of the tutu.
Then cut your tulle to the length of your desire, for my year old daughter, I cut them 25 in long
Then just follow the pictures below and you got yourself a cute inexpensive tutu.


And Voila, you got yourself the cutest tutu ever. You can put bows, flowers or ribbons. . . The possibilities are endless.

Let me know if you have any questions. . . I know I am not very good at this whole tutorials thing. If you make one, I will love to see it, so send me pictures or a link :)
 Happy Crafting everyone!